

How to Strengthen Hip Flexors Safely and Effectively
Strong hip flexors help you lift your knees, climb stairs, walk uphill, run, kick, and step over objects. They also contribute to pelvic and hip control during everyday movement. When these muscles lack strength or endurance, routine activities may feel less stable, smooth, or comfortable.
The hip flexor group includes the iliopsoas, rectus femoris, sartorius, tensor fasciae latae, and other supporting muscles. The iliopsoas, formed mainly by the psoas major and iliacus, is a primary hip flexor and also contributes to control around the pelvis, lumbar spine, and front of the hip.
A 2024 systematic review found that iliopsoas activation generally increases when the leg moves through greater hip flexion, particularly during controlled leg-raising and leg-lowering exercises. Added resistance can make these exercises more demanding, but beginners should first learn to control the pelvis and lower back.
You do not need complicated equipment to build stronger hip flexors. The American College of Sports Medicine’s updated 2026 guidance emphasizes consistency and notes that bodyweight exercises, elastic bands, free weights, and home-based routines can all improve strength when performed regularly and progressively.
What Are the Hip Flexors and What Do They Do?
The hip flexors are a group of muscles located mainly at the front of the hip and upper thigh. Their primary action is hip flexion, which occurs when you bring your thigh toward your torso. This movement happens whenever you march, climb steps, enter a vehicle, or raise your foot from the ground.
The iliopsoas is especially important because it connects the lower spine and pelvis to the upper thigh bone. The iliacus helps stabilize the pelvis and contributes to effective hip flexion, while the psoas major supports the lumbar region and assists with lifting the thigh in standing and lying positions.
The rectus femoris, which is part of the quadriceps, also helps flex the hip while extending the knee. The sartorius and tensor fasciae latae assist with hip movement in different directions. This means that no single exercise trains every hip flexor equally or prepares the entire hip for every activity.
Hip flexors work with the abdominal muscles, glutes, adductors, hamstrings, and deep hip stabilizers. Training only the front of the hip may create an incomplete program. A balanced routine should develop hip flexion while also improving extension, side-to-side control, rotation, and trunk stability.
How to Know Whether Your Hip Flexors Need Strengthening
Possible signs of weak hip flexors include difficulty lifting the knee, climbing stairs, stepping into a high vehicle, or maintaining a smooth running stride. One leg may also feel less controlled during marching exercises. These signs can suggest reduced strength, but they do not confirm a specific muscle problem.
Weakness may become more noticeable when you raise one knee above hip height or hold it without leaning backward. You may feel the front thigh working while the deeper hip muscles fatigue quickly. The body may compensate by arching the lower back, tilting the pelvis, or swinging the leg.
A feeling of tightness does not always mean the hip flexors need more stretching. A muscle can feel tight because it is fatigued, weak, irritated, or working harder to stabilize an area. Constantly stretching without checking strength, movement control, and symptoms may fail to address the actual problem.
Pain cannot be used as a simple test of weakness. Front hip or groin pain may involve the iliopsoas tendon, joint, labrum, bursa, muscle strain, or another structure. Resisted seated hip flexion is sometimes used during clinical assessment, but painful symptoms should be evaluated by a qualified professional.
Prepare Your Hips Before Strength Training
Begin with five to ten minutes of low-impact movement, such as walking, easy cycling, or gentle marching. A warm-up raises tissue temperature and gives you time to notice stiffness or pain before resistance is added. The AAOS recommends low-impact activity before beginning a hip-conditioning session.
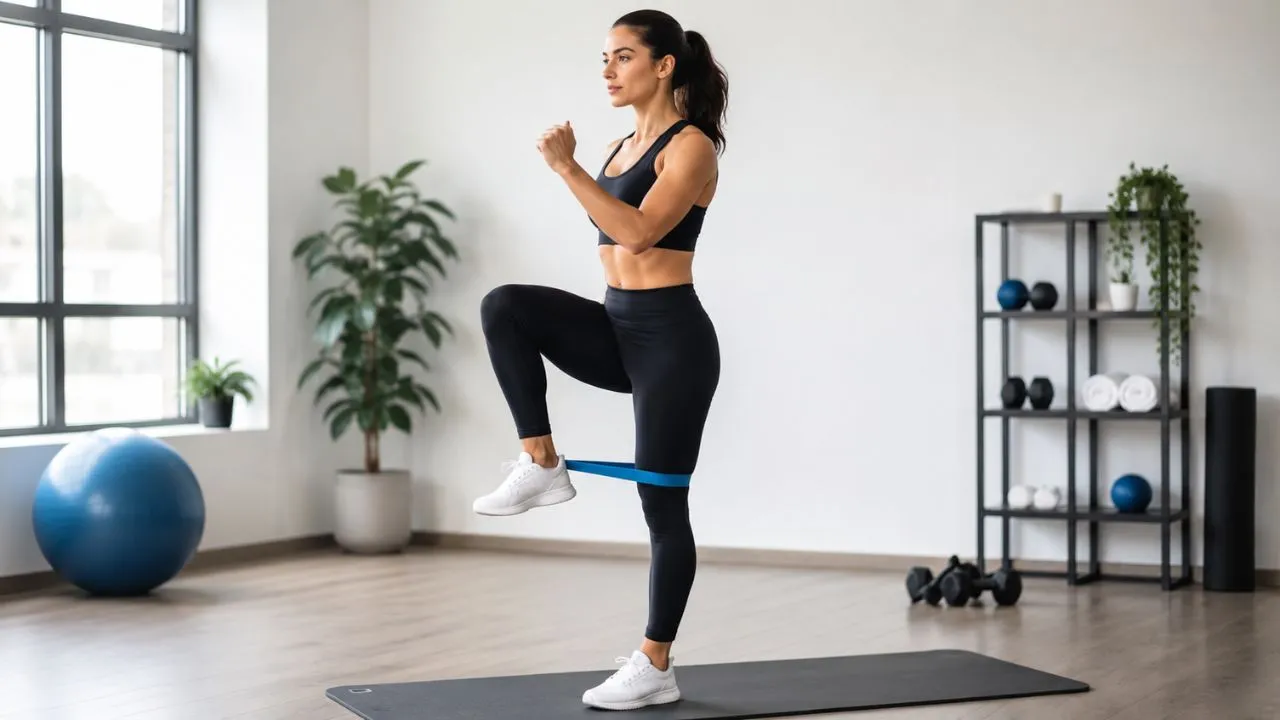
Next, practise several slow bodyweight knee raises while holding a wall or chair. Keep your ribs over your pelvis and avoid leaning backward. The movement should come mainly from the hip rather than from swinging the leg, twisting the torso, or arching the lower back.
Start with a comfortable range of motion. Raising the knee higher does not automatically make an exercise better, especially when your pelvis begins to tilt or the front of the hip feels pinched. Use the greatest range you can control without sharp pain, catching, or loss of balance.
Exercise should create muscular effort, not joint pain. Stop if you experience sharp groin pain, painful clicking, numbness, sudden weakness, or symptoms that continue worsening. The AAOS advises against ignoring pain during hip exercise and recommends professional guidance when movement is painful or unclear.
Start With a Standing Knee Raise
The standing knee raise is a practical beginner hip flexor exercise because it resembles walking and stair climbing. Stand upright beside a wall or sturdy chair. Place one hand on the support, keep both feet facing forward, and gently tighten your abdominal muscles.
Slowly lift one knee toward your waist without leaning backward. Pause briefly, then lower the foot with control. Keep the standing leg tall and avoid allowing the pelvis to drop, rotate, or shift far to one side as the opposite knee rises.
Begin with two sets of eight to twelve repetitions on each side. Move slowly enough that you can stop at any point in the exercise. When twelve repetitions feel easy and your form remains steady, add a longer pause or a light ankle weight.
You should feel effort near the front crease of the working hip and upper thigh. You should not feel a sharp pinch deep in the groin or strong pressure in the lower back. Reduce the lifting height if your spine begins arching or your torso starts swinging.
Build Strength With Seated Hip Flexion
Seated hip flexion allows you to train the hip flexors while the chair supports your body. Sit near the front of a stable chair with your feet flat and your torso upright. Keep your pelvis level and place your hands beside you for light support.
Lift one knee several inches without pushing through the opposite foot or leaning backward. Hold the raised position for two or three seconds, then lower slowly. A controlled seated knee lift can help beginners learn to activate the hip flexors without balancing on one leg.
Perform two or three sets of eight to twelve repetitions per side. For an isometric variation, raise the knee and hold it for ten to twenty seconds. Start with short holds and stop before your posture changes or the front of the hip becomes painful.
To progress, loop a light resistance band around both feet or anchor it beneath the opposite foot. Lift against the band while keeping the movement controlled. Greater hip flexion and external resistance can increase iliopsoas activation, according to the 2024 exercise review.
Use Supine Marching to Train Control
Supine marching strengthens the hip flexors while teaching the trunk and pelvis to remain controlled. Lie on your back with both knees bent and feet resting on the floor. Keep your spine in a comfortable neutral position rather than forcing it completely flat.
Gently tighten your abdomen, then lift one foot a few inches until the knee moves toward the torso. Lower the foot quietly and repeat on the other side. Avoid rocking the pelvis, holding your breath, or allowing the lower back to arch as the leg rises.
Complete two sets of eight to ten controlled repetitions per side. Move slowly and place the foot down softly after every repetition. The exercise becomes less effective when speed, momentum, or a large range replaces controlled hip movement.
Progress by lifting both feet into a tabletop position and lowering one heel at a time. This variation creates a longer lever and demands more abdominal control. Return to the basic march if you cannot maintain your trunk position or feel increasing lower-back discomfort.
Add the Straight-Leg Raise Carefully
The straight-leg raise can create greater demand because the extended knee makes the leg a longer lever. Lie on your back with one knee bent and the other leg straight. Point the toes upward and gently brace your abdominal muscles before beginning.
Raise the straight leg until it is approximately level with the opposite thigh, then pause briefly. Lower it slowly without dropping the heel. Keep the knee straight but not forcefully locked, and prevent the pelvis from rotating or the lower back from lifting excessively.
Begin with one or two sets of six to ten repetitions. This exercise may feel considerably harder than a bent-knee march, so a low starting volume is reasonable. Stop the set when you lose control rather than continuing with swinging or shortened repetitions.
Research examining hip flexor muscle activation has found that controlled leg raising and lowering can produce meaningful iliopsoas activity, particularly through moderate degrees of hip flexion. More muscle activation does not mean everyone should begin with the hardest variation.
Progress to a Resistance-Band March
A resistance-band march trains hip flexion in a standing position and can be adjusted easily. Anchor a light band behind you at ankle height and attach it securely around one foot. Stand tall while holding a stable support until you are confident with your balance.
Drive the attached knee forward and upward against the band. Pause without leaning back, then return the foot slowly. Keep the standing leg stable and avoid allowing the resistance to pull your pelvis backward or twist your trunk toward the anchor.
Complete two or three sets of eight to twelve repetitions on each side. Choose a band that makes the final repetitions challenging without changing your posture. A heavier band is not useful when it causes jerking, lower-back extension, or a smaller uncontrolled movement.
Progress by increasing band tension gradually, pausing longer at the top, or performing the movement without hand support. Elastic bands are a valid resistance-training option, and current ACSM guidance states that nontraditional and home-based methods can produce worthwhile strength improvements.
Use Step-Ups for Functional Hip Strength
Step-ups develop the hip flexors within a movement that also uses the glutes, quadriceps, calves, and trunk. Begin with a low step and stand close enough that you do not need to reach forward. Place the entire working foot on the platform.
Push through the raised foot and bring your body onto the step. Lift the opposite knee briefly at the top, then step down with control. Keep the working knee aligned over the foot and avoid pushing excessively from the leg that remains on the floor.
Begin with two sets of six to ten repetitions per side. Use a railing, wall, or stable support when necessary. Choose a step height that allows smooth movement without a painful pinch at the front of the hip or loss of pelvic control.
Increase the height only after the basic version feels comfortable. You may later hold light dumbbells or add a knee-drive pause. Because step-ups train several muscles together, they complement direct hip-flexion exercises rather than replacing all targeted iliopsoas strengthening.
Train the Whole Hip, Not Only the Hip Flexors
Strong hip flexors work best when the surrounding muscles can also control the pelvis and thigh. Include exercises for the gluteus maximus, gluteus medius, hamstrings, adductors, and trunk. These muscles help maintain alignment during walking, running, lifting, and single-leg activities.
Glute bridges train hip extension, while side-lying leg raises or band walks target the outer hip. Hip adduction exercises train the inner thigh, and controlled dead bugs challenge trunk stability. These movements create a more balanced lower-body program than repeated knee raises alone.
The AAOS hip-conditioning program includes hip abduction, adduction, and extension because different muscle groups contribute to hip stability. It recommends gradual resistance increases and continued training several days per week after a structured recovery period.
Balance does not require performing every possible exercise in one workout. Select one or two hip-flexion movements, one hip-extension exercise, one side-hip exercise, and one trunk exercise. Progress those movements consistently before adding more variety or advanced equipment.
Follow a Simple Weekly Hip Flexor Program
Train the hip flexors two or three times per week on nonconsecutive days. This schedule gives beginners repeated practice while allowing recovery between sessions. Current ACSM guidance places greater importance on consistent participation than on following a complicated or supposedly perfect routine.
On the first training day, perform standing knee raises, seated hip flexion, glute bridges, and side-lying leg raises. Complete two sets of eight to twelve repetitions for each movement. Use a slow tempo and stop each set before technique begins to break down.
On the second training day, use supine marches, straight-leg raises, low step-ups, and a controlled trunk exercise. Again, begin with two sets. People with more training experience may add a third weekly session, but it should not simply repeat a painful or exhausting workload.
Leave at least one comfortable repetition available at the end of most beginner sets. Training to complete muscular failure is not required for general strength development. The 2026 ACSM update reports that failure training and complicated programming do not consistently improve outcomes for the average healthy adult.
Progress Your Exercises Without Causing Pain
Progressive overload means gradually asking a muscle to do more as it becomes stronger. You can add repetitions, resistance, range of motion, pauses, sets, or exercise difficulty. Change one factor at a time so you can identify how your body responds.
First, improve control and reach the top of your planned repetition range. Next, add a small amount of resistance and return to fewer repetitions. The AAOS uses a similar approach in its hip program, increasing resistance gradually after the higher repetition target becomes manageable.
Do not increase resistance simply because an exercise does not produce soreness. Soreness is not required for strength development and does not reliably measure workout quality. Better signs of progress include improved control, more repetitions, stronger resistance, easier stair climbing, and less compensation.
Muscular fatigue that settles after training is different from sharp joint pain or worsening groin discomfort. Reduce the load when symptoms appear during every repetition or remain aggravated afterward. A physical therapist can adjust the exercise angle, resistance, and range when progress repeatedly triggers pain.
Should You Stretch and Strengthen the Hip Flexors?
Stretching and strengthening address different physical qualities. Stretching may improve or maintain range of motion, while resistance exercise develops force and endurance. A person can have flexible but weak hip flexors, strong but limited hip flexors, or symptoms that do not come from either problem.
A half-kneeling hip flexor stretch may be useful when hip extension is genuinely limited. Keep the torso upright, tighten the glute on the kneeling side, and shift the pelvis forward slightly. Avoid creating the movement by arching the lower back or forcing the front of the hip.
Hold a comfortable stretch for approximately twenty to thirty seconds without bouncing. Stretching should create mild tension, not a sharp pinch or burning pain. The AAOS recommends gently stretching muscles around the hip as part of a broader conditioning routine.
Do not assume that long hours of sitting automatically mean your hip flexors need aggressive stretching. Strengthening, movement breaks, improved sitting positions, and a more complete hip program may be equally important. Choose exercises according to your actual movement limitations and symptoms.
Common Hip Flexor Strengthening Mistakes
The most common mistake is leaning backward during knee raises. This position allows the trunk and lower back to create movement that should come from the hip. Reduce the knee height, use support, and keep the ribs positioned over the pelvis.
Another mistake is progressing to hanging leg raises, heavy cable lifts, or high-resistance bands too early. Advanced exercises may create substantial hip-flexor demand, but they also require trunk strength and movement control. Higher muscle activation is useful only when the movement remains appropriate and pain-free.
Some people perform hip flexor exercises every day because the muscles feel weak. Daily high-effort training may not allow enough recovery and can irritate the front of the hip. Two or three focused weekly sessions are usually a more manageable starting point.
A final mistake is ignoring the glutes, abdominal muscles, and side hip. Hip movement depends on several muscle groups working together. A program built only around knee lifts may improve one action while leaving other important directions and stabilizing functions undertrained.
When to See a Doctor or Physical Therapist
Seek professional advice when hip or groin pain is severe, began after a fall, or prevents normal weight-bearing. Sudden weakness, major swelling, visible deformity, numbness, fever, or pain that wakes you repeatedly should not be managed only through an online exercise routine.
A physical therapist can help when one side remains much weaker, exercises repeatedly cause a deep pinch, or clicking occurs with pain. Assessment may include strength, mobility, walking, balance, trunk control, and resisted hip flexion rather than focusing only on where discomfort is felt.
People recovering from hip surgery, a muscle strain, tendinopathy, hip impingement, dysplasia, arthritis, or a labral injury need an individualized plan. The iliopsoas can contribute to hip stability, but the correct exercise range and resistance depend on the underlying condition and stage of recovery.
The AAOS recommends completing rehabilitation exercises under medical or physical-therapy supervision after injury or surgery. Professional guidance is also sensible when symptoms fail to improve after several weeks of careful training or continue interfering with work, sport, sleep, or daily activities.
Final Thoughts
The best way to strengthen hip flexors is to begin with controlled knee-lifting exercises and progress gradually. Standing knee raises, seated hip flexion, supine marches, straight-leg raises, banded marches, and step-ups can all have a place in a well-designed program.
Proper form matters more than lifting the knee as high as possible. Keep your trunk steady, avoid arching the lower back, and use a resistance that allows smooth movement. Stop when muscular control disappears rather than completing poor-quality repetitions.
Train the hip flexors two or three times per week while also strengthening the glutes, side hip, inner thigh, and trunk. Consistent practice with simple equipment can build strength effectively, and complex programming is unnecessary for most healthy adults.
Painful hip flexion should not be treated as ordinary weakness. Reduce the exercise, review your technique, and seek professional assessment when symptoms persist. The goal is not merely stronger muscles, but comfortable and controlled movement during daily life, exercise, and sport.
Frequently Asked Questions
How often should I strengthen my hip flexors?
Train them two or three times per week, ideally with recovery days between sessions. Beginners can start with two exercises and two sets per movement.
What is the best exercise for weak hip flexors?
Standing knee raises and seated hip flexion are good starting exercises. The best choice is one you can perform through a comfortable range without leaning, swinging, or feeling joint pain.
Can walking strengthen the hip flexors?
Walking uses the hip flexors, but it may not provide enough resistance for meaningful strength gains. Direct exercises with controlled repetitions and gradual resistance offer a clearer progression.
How long does it take to strengthen hip flexors?
Many people notice better control within several weeks, while larger strength changes usually require consistent training over a longer period. Progress depends on the starting level, resistance, recovery, and any existing injury.
Should I strengthen hip flexors if they feel tight?
Possibly, because tightness can sometimes occur alongside weakness or fatigue. Avoid assuming that stretching is always the answer, especially when the front of the hip is painful or pinches during movement.